Now that my baby is almost a year old, we’ve got nearly 6 months of solids food eating underway. It has been such a fun experience watching her explore food. She is an incredible eater compared to most kids her age and I am thankful she is always willing to try new foods.
When I was pregnant, I read the book Bringing Up Bébé (highly recommend!) that shares bits of wisdom from French parenting. One of the main topics in the book was about kids’ eating and it really struck a cord with me. The idea is this: Kids Eat What Parents Eat. It involves eating mostly real food, eating a variety of food – including lots of colorful vegetables, tasting new items, having a healthy relationship with eating habits, and eating together as a family. When we were getting close to starting solids with my daughter, I started to research more about how to implement this practically and discovered Baby Led Weaning (BLW).
(FYI: Weaning in this case simply means the introduction of solids, and not weaning from breastmilk.) BLW takes into practice the whole idea above in a safe way for little babies as they are learning how to eat. Babies have been eating what their parents ate for thousands of years- far before we had blenders to make purees or little baby spoons. Many nations around the world follow the BLW way naturally.
We have loved the BLW process and I’m now a huge advocate of how it works to create a healthy little eater. My mom and husband were very skeptical at first, but now they are believers in the process too! Here are the benefits I have seen so far:
- Family Meals: Sharing food together as a family and in community are important to me. Developing this habit early was a big goal for me. The biggest benefit practically is that baby sees you eating and mimics you- both being willing to eat what you eat and copying the way you eat (chewing, bite sizes, using utensils). This also begins to teach a baby how to behave at a dinner table -I think has already had a positive effect on our ability to eat in public without causing a scene and actually getting to eat our own meals.
- Confidence & Independence: Giving my daughter the ability to learn how to eat has given her confidence in trying new foods and starting to be self-sufficient. It also gives me a much-needed break as I don’t always have to sit there spoon feeding her.
- Safety- Chewing Before Swallowing: When babies start with purees, they are used to getting a large amount of food in their mouth and swallowing. When they start solids from there, food often must be cut very tiny so they do not choke. BLW teaches babies how to chew before swallowing. It also teaches how much is appropriate to bite off of an item and how much will fit in their mouth. Since babies have a stronger gag reflex when they are younger, it is the perfect time to teach this skill- I have seen my daughter fill her mouth and start to gag, learning to spit it out and try again rather than forcing it down and choking.
- Developing Tastes: Have you tasted baby food? It’s bland and disgusting. It doesn’t taste good to us, so why would a baby want to eat it? Babies are born with a full set of 10,000+ taste buds and are just as eager to enjoy their meals as we are. There is no reason to stay away from various flavors or spices. My daughter can eat food just as spicy as I like it and she prefers her food to be well-seasoned. She loves chili, Tex-Mex and BBQ!
 Learning by Touch/Senses: We all know that babies learn by putting things in their mouth. They explore the whole world this way. As I put various items from our meals on her tray, she gets the chance to touch everything- the different textures and sizes- and develop her grasp. She also gets to experience the smells and colors of her food much better than she would through a puree. Babies are drawn to color (as we see in their toys) and this translates to the food they eat as well- often, my daughter will choose the orange sweet potato or green bean or red beet over white bread.
- Convenience: I don’t have time to make homemade purees. When we go out, she just eats whatever I order. And at home, she eats whatever I cook. I’m not making special meals for her or accommodations. It’s simply easier on me.
Does this sound like something you would be interested in trying with your baby? I know that getting started with something so different to the norm can be overwhelming, but here’s a little intro on what helped me the most:
Resources: I recommend reading either of the following BLW books:
I also joined the Baby Led Weaning for Beginners Facebook group to see helpful pictures and videos, answers to questions and tons of tips. I started following it about 2 months before we started and it was more helpful than anything!
When to Start: No sooner than when baby is 6 months of age, can sit unassisted, has lost the tongue-thrust reflex, and has an interest in food.
Safety: Choking risk is the number one reason I hear that people are afraid to try BLW. As I mentioned above, BLW does not increase choking risk. The key thing is to learn the difference between gagging and choking. Gagging is a reaction that helps prevent choking and teaching them how not to choke- letting them work it out and learn. Watching videos on the Facebook group and knowing the signs for gagging vs. choking are important. As always, it is important to know child CPR as a parent, and that knowledge should help you be more confident when your baby eats. An easy way to distinguish: If they are loud & red, let them go ahead. If they are silent & blue, they need help from you.
In general, baby should be eating what you are eating, with a few health/safety exceptions…
- Don’t offer whole nuts or popcorn or peanut butter on a spoon- items that can easily stick to/in their throat.
- Quarter (lengthwise) round foods to avoid lodging in the windpipe: blueberries, grapes, cherry tomatoes, sausage, string cheese, carrots.
- Season generously but limit the salt/sodium. Since your babies kidneys aren’t fully developed, too much sodium can cause them harm. This is another good reason to avoid processed food.
No teeth? No problem. My daughter did not have teeth when we started. She still would mimic my chewing and those jaws + saliva are powerful at breaking down foods to swallow. You would be amazed at how she learned to pull at a strip of meat with her gums and chomp on it a few minutes before swallowing. This girl loved steak even before she had teeth.
Food Before One Is Just For Fun: For the first couple of months, my daughter really did not eat a lot. She would taste and chew and explore, but would swallow very little. And that is perfectly normal and okay. Breast milk or formula is still a baby’s main source of nutrition before the age of one.
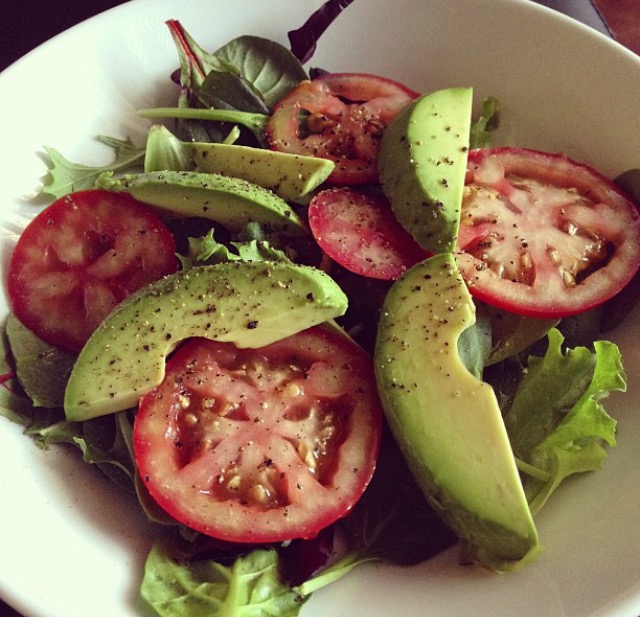
 Cutting to Size: There is no need to cut foods into tiny pieces. In fact, you want foods to be more finger-sized so they are easier for young babies to pick up and hold. Having large pieces also helps them learn to bite off an appropriate amount. Cutting little grooves in slippery items like banana and avocado is also helpful to keep their grip. Here is a great picture to use as an example when you are preparing food for your little:
What do you think? Is this something you would try with your baby? Have you tried it and loved it (or hated it)? I would love to hear from you!